How to point your domain to CloudFlare?
It is possible to point your domain to CloudFlare using two ways:
1. By recording a CNAME for www.domain.com
NOTE: CNAME setup is available for Business or Enterprise CloudFlare paid plans.
2. By pointing the domain name to CloudFlare server names. To do the following steps:
After you register a new account, CloudFlare will send you an email with a link to set a password. By clicking on the link, you will be redirected to a menu with the ability to set a password for your CloudFlare account. Then you can log in.
On the very first page enter the domain name you want to configure CloudFlare for, and click "Scan DNS records":
After scanning is completed, click Continue.
On the next page, you will need to check once again whether the DNS records match the records in your cPanel and click Continue.
NOTE: We do not recommend you to change the DNS records at this stage, as you can do this after the installation is complete.
Select the desired tariff plan and click "Continue".
On the next page, you will be prompted to change the name servers to CloudFlare.
If you've registered your domain with another domain registrar, you need to log in to your account and change the name servers for this domain.
If your domain is registered with Hostimul, you need the following instructions:
1. Log in to the Hostimul website. Click on the “Client Panel” button in the upper right corner of the page:
2. On the new page, select the "Domains" menu:
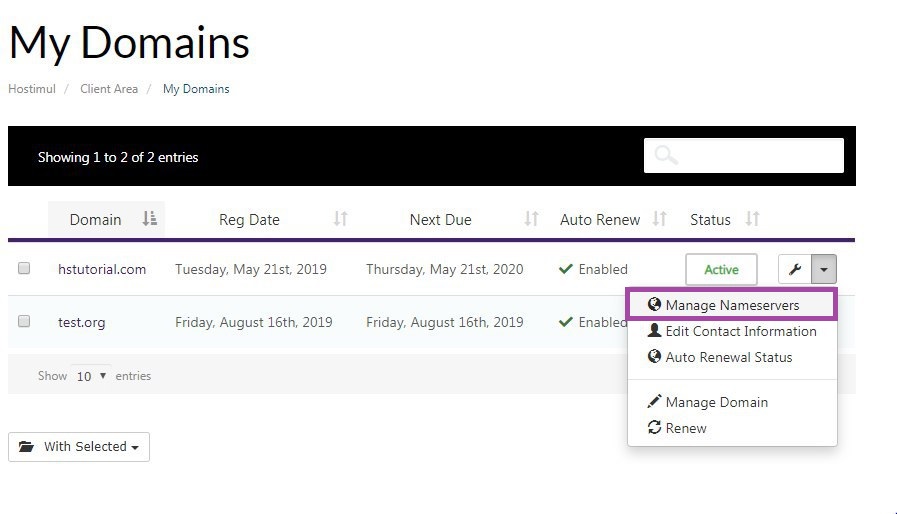
3. Select the "Manage Nameservers" option next to the domain name that you want to bind to CloudFlare:

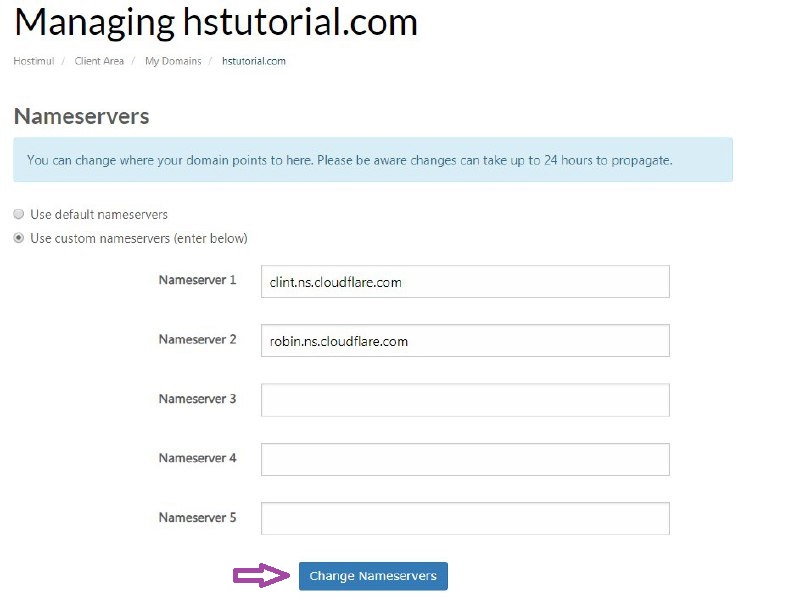
4. On the new page, enter the name servers specified in the CloudFlare account, then click Change Name Servers:

NOTE. After setting up the name servers, local ISPs may need up to 24 hours (in rare cases, more) to update the DNS cache so that everyone can see your website.
Useful Links