How to use File Manager in cPanel?
In this guideline, you will find detailed instructions on how to manage (add, delete, view, modify) files from your cPanel account using File Manager.
How to access File Manager:
1. Log into your cPanel account.
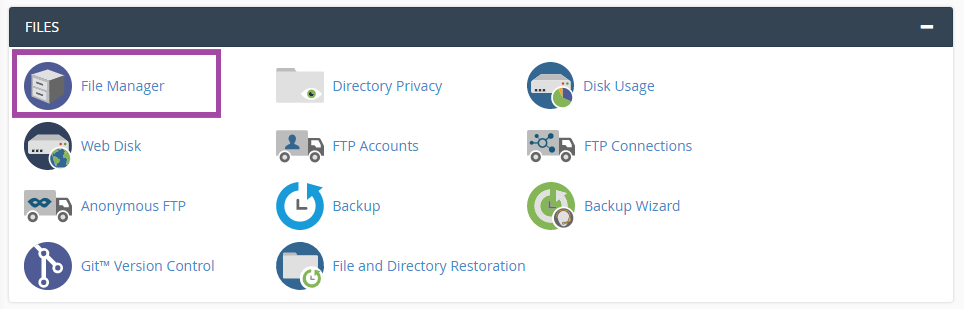
2. Navigate to Files section > File Manager menu:
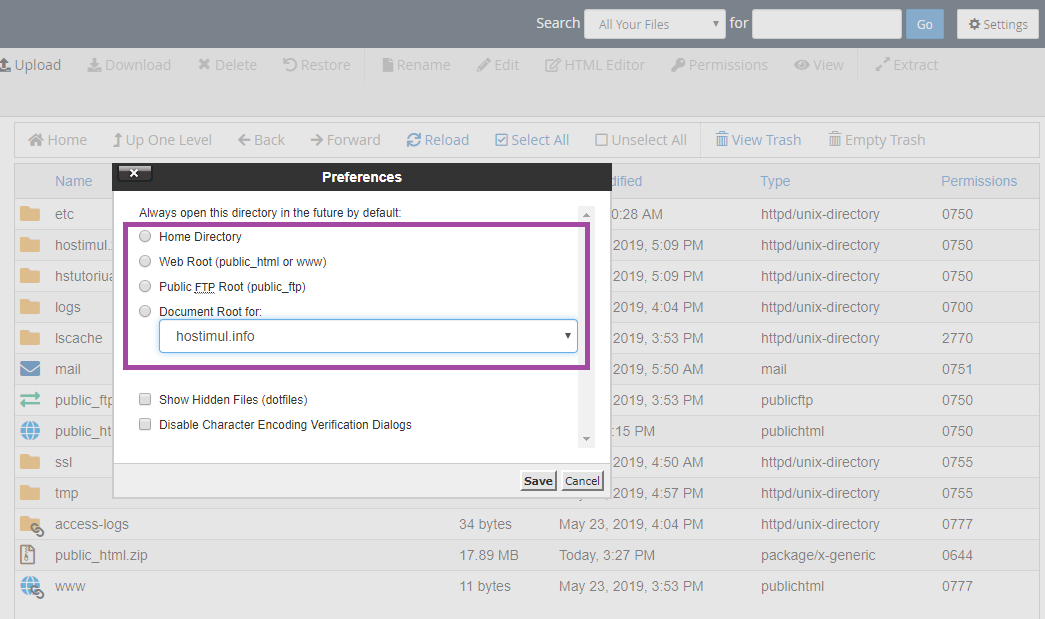
3. You will be taken /home/user directory by default. Feel free change the default directory in Settings menu:
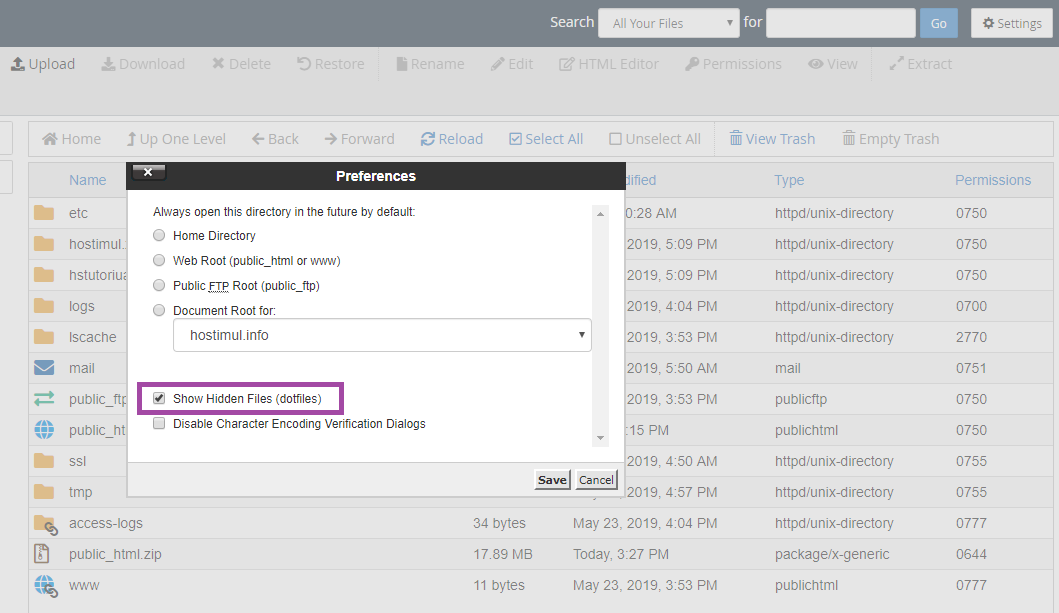
Here you can also enable Show Hidden Files (dotfiles) option. In this way system files, like .htaccess, will be displayed in File Manager as well:
4. The public_html folder is the web root for your primary domain name. This means that public_html is the folder where you put all website files which you want to appear when someone types your main domain (the one you provided when you signed up for hosting). If you wish to upload files for your addon domain, you will need to move to public_html/youraddondomain.com directory.
5. The interface of File Manager is divided into 4 sections: #1 The file manager toolbar
#2 The file window
#3 The navigation toolbar
#4 Current location window
In the first section, you can find a toolbar with all the basic functions for managing files like create a new folder, delete a file, upload/download and much more. The second is the file listing section, it displays the content of the selected directory. If no files or folders are created, the following message will be displayed in the file window.
This directory is an empty message. The navigation toolbar section allows navigating between folders in the file window. The location section shows the directory you are currently located in.
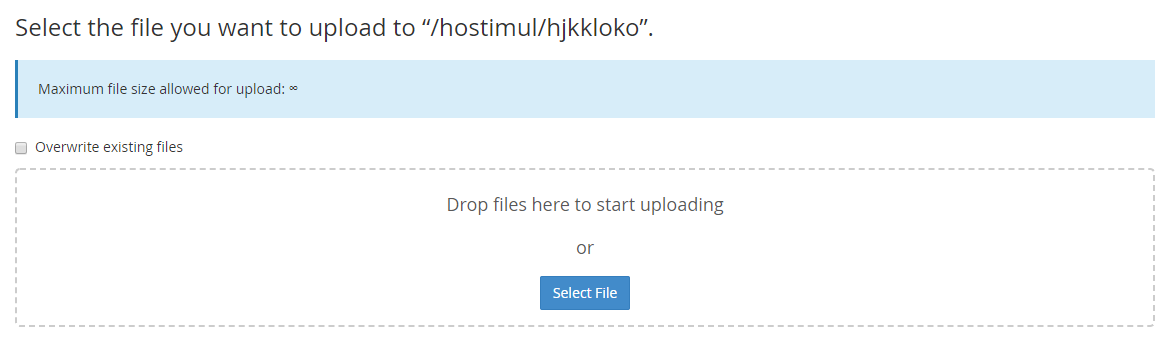
To Upload a file:

- Go to File Manager
- Navigate to the folder you wish to upload the file(s) to
- Click on Upload icon
- Click Select File and locate the file on your local computer
- Select the file and click on Open/Choose
- Or simply drag and drop the needed file from your local machine to the upload window
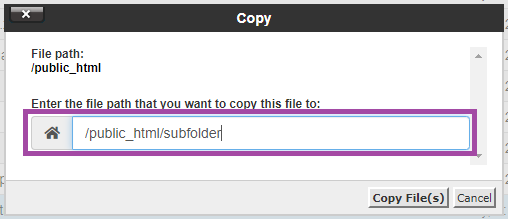
To Copy/Move a file:

- Go to File Manager
- Select the file(s) you wish to copy/move (to select multiple files, hold the Ctrl+Command button)
- After the needed items are selected, hit Copy or Move icon
- Or right-click on the selected file(s) and choose Copy or Move option from the drop-down menu
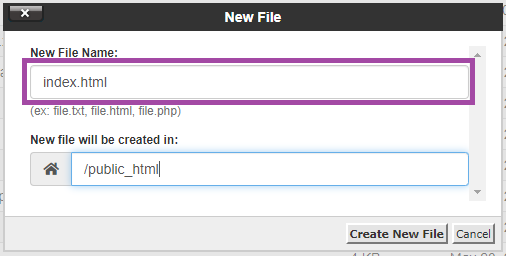
To create a new file:

- Go to File Manager
- Navigate to the folder where you wish to create a file
- Click on +File icon – a new pop up box will appear to enter the name of the file you wish to be created
- Click the Create New File
To Delete a file:

- Go File Manager
- Navigate to the folder where the file(s) you wish to delete is located
- Select the file(s) and hit Delete icon
- The deleted files are moved to the system .trash folder. If you wish to remove the file(s) permanently, check-mark Skip the trash and permanently delete the files option
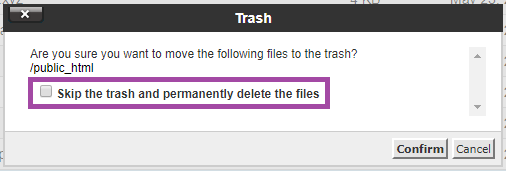
NOTE: The files will be stored in the trash folder for 90 days. After that, they will be removed from the server automatically.
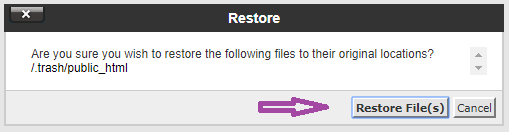
To Restore a file:

- Go to File Manager
- Navigate to .trash folder in /home/user/ directory
- Select the needed file(s) and hit Restore icon
To Edit a file:

- Go File Manager
- Select the file you wish to edit and hit one of Edit icons
- Choose one of the three following editors from the pop-up menu:
Edit: this editor will edit a document as code and give line numbers down the side of the editor. You can highlight your code with color by using the syntax drop-down menu and selecting the code you are working with HTML Editor: this editor will edit a document as an HTML document. In this editor, you can also switch between design view (as a text document), source view (through the html code itself), or a preview mode (view the page through the web) by selecting the appropriate tab in the bottom left of the editor
To Compress a file:

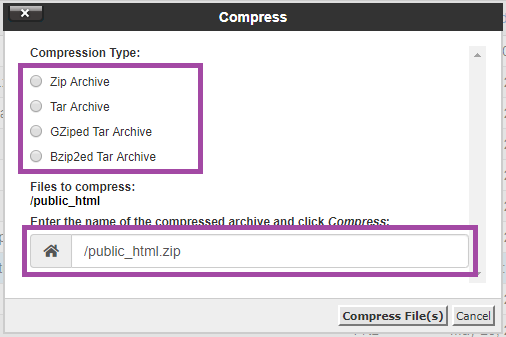
It is useful to store a group of files in one file for an easy backup or for a transfer to another directory as well as compress large files. Compressed files take up less disk space and are downloaded faster via the Internet. The data can be compressed into a single *.zip, *.Gz, or *.Bz2 archive.
- Go to File Manager
- Select the files/directories you wish to compress and hit Compress icon
- Define Compression Type and enter the name of the archive
- Once done, hit Compress File(s)
To Extract a file:

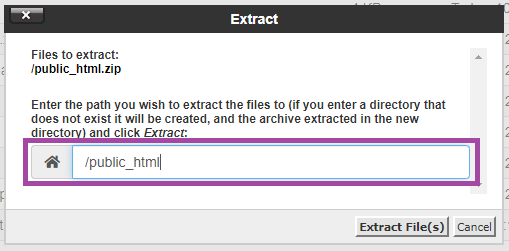
- Go to File Manager
- Select the file you wish to uncompress
- Hit Extract icon
- Define the path you wish to extract the file to
- Once done, hit Extract File(s)
To change Permissions for a file:

- Go File Manager
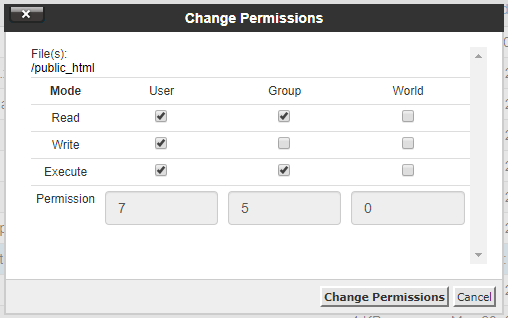
- Select the file/folder you wish to change permissions for and hit Permissions icon
- Set the needed value and hit Change Permissions